WELCOME

Textile artifacts - not too serious - not too impractical - just for fun - handmade from wool, fiber, fabrics and decorated with - well - whatever.........

Monday, June 10, 2013

Crochet Dilly Bag Pattern

In response to further requests, I've endeavoured to write a pattern for the crochet dilly bag.  A much more difficult project, both for me to write and for you to make.  To keep it as simple as possible, the pattern is for a smaller version of the large bag previously shown.
This bag measures 15" (37.5cms) in circumference x 8 " (20cms) in height, an ideal size for a young girl, and also useful on many occasions for a big girl.  Large enough to hold a phone, medium purse and glasses, keys plus other small belongings.
The yarn can be any sturdy acrylic, wool or cotton.  8 ply and a 3.50mm hook were used.
Because of the stitch variations, a plain colour would also look nice.

Abreviations :  As before, I've used English/Australian terminology, with some abreviations such as ch = chain, dc = double crochet, tr = treble, sl st = slip stitch, st = stitch, sp = space.
BASE :  make 5 ch, join with sl st to form a ring.
Round 1 : 3ch (counts as 1tr), 14tr into ring.  Join to 3rd ch of 1st 3ch tr.
Round 2 : 3ch, 1tr into same sp, * 2tr into top of each tr. Repeat from * around joining to 3rd ch of 1st tr.  28tr
Round 3 : 3ch, * 2tr into top of next tr, 1tr into top of next tr, * repeat from * to * around, finishing 2tr into last tr and joining with sl st to 3rd ch of 1st tr.  42tr
Round 4 : 3ch, 1tr into next tr, 2tr into next, * 1tr into each of next 2tr, 2tr into next - repeat from * around, finishing with 2tr into last tr and joining with sl st to 3rd ch of 1st tr.  56tr
Round 5 : 3ch, 1tr into each of next 2tr, 2tr into next, * 1tr into each of next 3tr, 2tr into next tr. - repeat from * all round, finishing 2tr into last tr and joining with sl st to 3rd ch of 1st tr.  70tr

MOTIF (1) : 5ch, join with sl st to form ring.
Round 1 : 3ch (counts as 1tr) 2tr into ring, * 2ch, 3tr into ring. Repeat from * twice more, finishing 2ch.  Join with sl st to 3rd ch of 1st tr. (4 groups and 4 spaces)
Round 2 : Join 2nd colour to a corner sp.  3ch, 2tr into sp. 2ch, 3tr into same sp * 1ch,(3tr, 2ch, 3tr) into next corner sp. Repeat from * all around and join as round one.
Round 3 : Join 3rd colour to a corner sp, 3ch, 2tr, into sp, 2ch, 3tr into same sp, * 1ch, 3tr group into the 1ch sp between groups of last round, 1ch, (3tr, 2ch, 3tr) into next corner sp. - Repeat from * all round, finishing 1ch and join as last round.

MOTIF (2) :  Work as the 1st motif to last round.  Join colour in corner sp and continue to the 3rd side.
Joining :  After 3tr into corner sp, 2ch, dc into corner sp of 1st motif, 3tr group into corner sp of 2nd motif. dc into 1ch sp of 1st motif, 3tr group into next 1ch sp of 2nd motif.  dc into next 1ch sp of 1st motif, 3tr group into corner sp of 2nd motif, dc into corner sp of 1st motif, 2ch, 3tr group into corner sp of 2nd motif, 1ch, 3tr group into side 1ch sp - join with sl st.

Work 5 motifs, joining last to first to make a circle. NOTE : 2 sides will be joined on the last one, so begin joining on 1st side, then on 3rd side.

If this method is too difficult, the squares can be stitched together.  The crochet joining provides space for the next treble row.  To achieve this with stitching, the end stitches could be left slightly loose, so as to allow the hook to pass through on next row.
Also, finishing off the ends is easier at this stage.
On one edge of the motif circle, join yarn to the right hand corner sp of a motif.  3ch (counts as 1tr) 1tr in the back of each tr and space across the side of motif, then 1tr into joining dc, (14tr).
Repeat 14 tr across each motif, joining to the 1st 3ch tr.  70tr around. * Working into the back of treble tops on this row gives a nicely defined edge to the squares. On following rows work into the top of tr in the usual way.
Work a second round of 70tr.  This edge becomes the lower one - to be joined later to the base.

Top Edge :  Join a colour to the other side of motif circle in the same way as before and proceed on 70tr, making 2 row stripes of different colours.  8 rows in all - on 8th row increase ....
Round 8 : 3ch (as 1tr), 2tr into next tr, 1tr into next 34tr, 2tr into next tr, 1tr into next 33tr, join with sl st to 1st.  72tr
Holes Row For Drawstrings : Starting where the last round ended - 5ch, miss 2tr, 1tr into next tr, * 2ch, miss 2tr, 1tr into next, Repeat from * all round, finishing 2ch and joining with sl st to 3rd ch of 1st 5ch. 24 spaces
Top Edging
Round 1 : 3ch (as 1tr) * 2tr into next 2ch sp, 1tr in next tr, repeat from * all around finishing with 2tr into last sp and joining to 1st as before. 72tr
Round 2 :  1dc into same connecting tr, 1ch, miss 2tr, 5tr into next tr (shell) * 1ch, miss 2tr, 1dc into next tr, 1ch, miss 2tr, "shell" into the next, repeat from * around finishing 1ch and join with sl st to first dc.  12 shells

A paper template of the base, can be cut - for a lining pattern.
Joining Base
With wrong sides together, right sides facing outwards and main bag piece in front, insert hook into top of a tr of main piece, continuing through the top of a tr in base piece, drawing yarn through and making a dc. Insert hook into next 2 corresponding trebles, making a dc. Make another dc in same spaces, 1dc in each of the next 34 correspoding tr, 2dc into next, 1dc into next 33 tr, join with sl st to first dc. ( This increase by 2 sts is for the next shell row)
Shell Round : 1dc into same sp, * 1ch miss 2dc, 5tr (shell) into next, 1ch, miss 2dc, 1dc into next, repeat from * around joining with sl st to 1st dc.
LINING
Cotton fabric in a matching shade is a good choice for the lining.  A piece measuring 22" (56cms) x 9" (22cms) is enough - or a fat quarter.
Cut a base circle 5.1/8" (12.5cms) in diameter.  This allows a .5cm (1/4") hem.
Cut a main rectangular piece 40cm x 18cm (16"x 7.1/4").  This includes a 1cm seam allowance on side and top and .5cm (1/4") on bottom.
A pocket can be attached at this stage before sides are sewn.  Contrast fabric will make it easy to see when needed.  The size can be just right for cards or a small notebook.
Machine stitch sides together, finish seam by pinking or overlocking.  Pin, then stitch base to the bottom end - right sides together and finish with zig-zag or overlock. This will need to be done slowly around the circle.  Turn a 1cm hem at the top, press or machine stitch, then slip stitch by hand, to inner bag, with wrong sides together, so the right side of lining shows when bag is open.
DRAWSTRINGS - make 2
Using double yarn and larger hook (5.00mm) make 70 chain.  18.1/2" (47cms).  Cut yarn leaving 3" tail and pull through last loop.  Make another in the same way.
Attach a safety pin to one end, and beginning at a side edge, thread the chain string through the holes working under and over all round, bringing out at the last space.  Even the length on both sides and holding ends of both strings in left hand, tie a knot with all tails together - pull tightly and cut to 1.1/4" (3cm).  Attach safety pin to second string and beginning at the opposite side of bag, thread in the same way through same holes, around, finishing off as the first one.
Pulled outwards together, the bag will close.  To open, put fingers into the top and pull out sideways.
Decoration - Finishing
It's easy to get carried away with charm dangles - they are so charming.  A suggestion would be to keep it lightweight, meaningful and with a punch of colour.  Interesting beads from an old necklace, fur bits, crochet or felt flower - whatever..... It doesn't have to be expensive to be beautiful.
The one shown is attached by a jump ring, through 2 trebles - towards the side.  It could be sewn on just as well.
I hope you enjoy making the crochet bag.  With some imagination, many variations can be created - happy crocheting :-)

Saturday, April 13, 2013

Special Request Crochet Pattern

It has been an interesting exercise to review an earlier creation and write a pattern for it.  The terminology is in English/Australian, as my knowledge of the descriptions used in the U.S.A. are limited.  Some abreviations have been used, such as :- sp = space, ch = chain, tr = treble, htr = half treble, dtr = double treble, dc = double crochet, st = stitch.

To save disappointment and unpicking later, it is best to work out a colour combination before beginning a square.  This one measures 4.1/2" x 4.1/2"  (11 x 11cms) - worked in 8 ply on a 3.50 mm hook.
For those who haven't tried double trebles before :-  Yarn over hook twice, insert hook into required space, yarn over, draw through space, yarn over, draw through first 2 loops on hook, yarn over, draw through next 2 loops, yarn over, draw through remaining 2 loops on hook.

PATTERN -  make 6 chain, join with slip st to form ring.
round 1 - 3ch (counts as 1tr) work 12 tr into ring, join with slip st to 3rd ch of 1st 3ch - drawing through the next colour.
round 2 - 3ch (counts as 1tr) 1tr into same sp. 2tr into top of each tr of last round.  Join as before, drawing through next colour. 24 tr
round 3 - * 4ch, miss 2 tr, dc into next, working into the back 2 loops ( this gives a better finished look) rep from * all round.  Slip into top of 1st tr of last round.  This is the petal colour and base for them - 8 spaces.
round 4 -  Into next 4ch sp, work * 1htr, 1tr, 3dtr, 1tr, 1htr. Slip st into top of next dc.  Rep from * all round.  8 petals.  Slip into 1st dc, drawing through next colour.
round 5 -  4ch, 1dc into top of 1st dtr (again working into back 2 loops of st) 3ch, miss 1dtr,1dc into next dtr, 1ch, 1tr into the slip st between petals, 1ch, 1dc into 1st dtr of next patal, 3ch etc.. all round.  Join to 3rd ch of 1st 4ch.  Keeping same colour, begin next round.
round 6 -  3ch (counts as 1st tr) 2tr into same space.  1ch * 3dtr, 2ch, 3dtr into 3ch sp on top of next petal.  (this is the corner of the square) 1ch, 3tr into top of next tr, 1ch, 3dc into next 3ch sp on top of next petal, 1ch, 3tr into top of next tr, 1ch - rep from * all round.
After the last 3dc, 1ch, slip into 2nd ch of 1st group.

Happy Crocheting :-)

Thursday, October 11, 2012

Big Crochet Flower Scarf

A new 'over the top' crochet flower motif, joined to make a long neck scarf.  The ice-cream colours match well with pastels, although against black or navy, it would make a strong impact.  A blue varigated yarn was used for the loopy edging and fringe, in keeping with the similar yarn on the last round of motifs.

Saturday, September 15, 2012

Patchwork Handknit Jumper

Knitting a jumper in random colours and shapes is quite a challenge - one I find creatively inspiring, even though sometimes there is undoing if a colour or gauge isn't right.  This one was made from different yarns, mostly 100% wool, because I wanted the "worn in" woolly look.  Knobbly and flecky yarns, sometimes vintage finds, can help with this.  In parts, two yarns were knitted together to make up the thickness.
There is a little pocket on the left side which I lined with cotton fabric.  Normally, they would have a knitted lining, but I didn't want the bulk, especially at hip level.  I felt the little pocket added to the ' country ' feel of the jumper.

Saturday, August 18, 2012

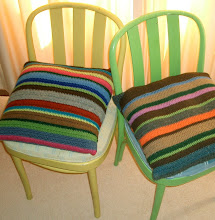
New Look Chair

Rather exotic, but interesting and certainly groovy.  A very old wooden dining chair was given 3 coats of bright lime green paint, then re-upholstered with Swedish decor fabric in a bold, dramatic pattern.

Sunday, August 5, 2012

Groovy Legwarmers

Another way to use small amounts of wool is to create some stripey legwarmers, knitted in 8 ply.  Starting at the ankle, cast on 42 stitches with 4.00mm needles - working a single rib band, then change to 4.50mm needles.  Increase each end on every 6th row, until a width is reached that corresponds to the measurement of the thigh, or however long you want them to be.  Change back to smaller needles to finish with a 3.5cm (1 1/2") band at the top.
There's a lot of ending off to do, but don't hurry and it will be done in no time.  :)

p.s. 42 stitches is enough to fit over a slim foot.  You can start with any amount, to fit over foot and heel - slightly stretched.

Sunday, July 1, 2012

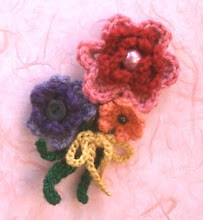
New Grunge Brooches

These new crochet brooches aren't actually grungy.  The name is used as a link to the style that evolved out of early 70's rock music and the colourful woolly look that went with it.
Made from pure wool, in keeping with the theme, they make an exciting accessory to pin a scarf, or on a jumper - especially a handknitted garment.


The dusty pink "Rose Bouquet" measures 5.5cm.  The "Autumn Leaf" 7.5cm across, and the "Psychedelic stripes" knitted brooch is 7.5cm across also.

Saturday, June 9, 2012

Red Crochet Poncho

There's something about crochet in red that's really very pretty.  Each time red is used, I think this, but forget and remember it anew when choosing the colour again.  This little poncho will fit a 2 to 3 year old.  Worked in 8 ply acrylic yarn, lightweight and machine washable.  A fun and cosy addition to a tiny tots wardrobe.

Sunday, May 27, 2012

New Children's Handknits

It has been some time since the last post.  Fortunately, the house hasn't been sold yet, and I've been able to enjoy some knitting time.  It is such a tactile craft, simple in it's requirements - beautiful bamboo needles and soft luxurious wool - a wonderful combination.
The weather now is cool enough to wear the light green top pictured in the previous post.  Children's knits have been a main item on the agenda for a few weeks.  This little boy's style is handknitted from new season's luxury machine wash wool, from the Bendigo Mills in Victoria.  A bold rib pattern worked on 5.50mm needles.  The wool needs to knit to 12 ply for this size needle.  Pattern repeats over 4 + 3 stitches and 2 rows.  Very easy and gives a wonderful texture.

Pattern : Row 1 : K3 *P1,K3 rep.from* to end.
               Row 2 : K1 *P1,K3 rep.from * to last 2 stitches, P1,K1.

Sunday, April 22, 2012

New Winter Handknit

A soft and simply styled, casual top for winter.  Ideal to wear over a thin close fitting tee shirt or skivy.  The pattern is easy, although slow growing.  Good to do, just for the pleasure of knitting.  Stitches are picked up from the shoulder and worked down to the length desired.
A vintage style pendant necklace is the choice to wear with this jumper.  Delicate ocean jasper from Madagascar on a long beaded chain.  The beads have been collected over time ..... a variety of gemstone, glass, vintage, and antique jet with pearl and silver.

Saturday, April 14, 2012

Embroidered Baby Jacket

When there's just one or two balls of wool left over, plus a few scraps, it can be an interesting project to create something useful from them.

This warm little cardigan / jacket is sized for a baby girl from 1 to 2 years. It took quite awhile to make..... the embroidered sprouting daisies are across the back and fronts. Freehand embroidery such as this, requires patience and an eye for calculating measurements. Definitely a one off garment - for some time, anyway. :)

Wednesday, March 21, 2012

Vintage Style Children's Knits

1970's adult styles made into miniture - recycled and updated with a touch of modern, are becomming a very popular choice. The little pink bolero/shrug is size 3 to 4 yrs. It has a lacey pattern with crochet edges and a 2.5cm flower button closure.

Blue/grey in colour, the cardigan - vest is ideal for inbetween seasons. Vintage found buttons compliment the style and add a childlike appeal to an otherwise quite conservative garment. Both are handknitted in 8ply.

Blog Posts may be on hold for awhile now, due to the rented house I live in, being placed on the market, for sale. A new chapter will begin in a different place.